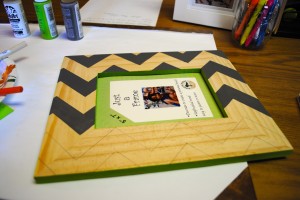
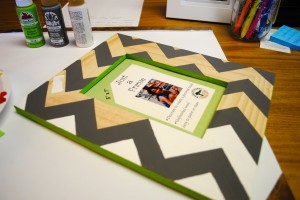
Crafts With Teeny: Earring Holder
Posted by TeenyThis one’s for the girls!
This month’s craft is a homemade earring and jewelry holder. It is very easy to make and a lot cheaper than most earring holders!
Supplies:
– Old frame ($3 Goodwill)
– Paint (optional)
– Burlap
– Glue
– Fabric Rosettes

1. Paint the frame whatever color and design you want. Make sure to let it dry completely (overnight is best).
2. Paint a design or letter on the burlap to add extra decorations! You can also use screen or chicken wire to hang the earrings. Let it dry completely. 
3. While everything is drying you can make your fabric rosettes by cutting extra fabric into strips (2” wide) and then rolling and twisting them into a rose or flower shape. You can add a little glue each time you go around to hold it in place. It’s easiest if you tie a knot at the end of the fabric strip and then start twisting from there. Make sure to keep some extra fabric at the end to fold it over the back and glue it. 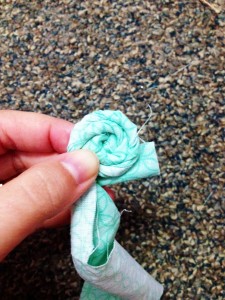
4. I used a glue gun to attach the burlap to the back of the picture frame. You’ll want to make it as tight as you can so that the burlap will hold the earrings. 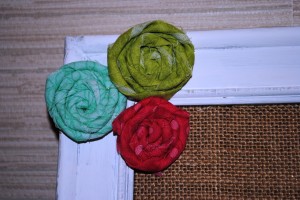
5. Finish off the earring holder by gluing your fabric rosettes to the frame and then hang your earrings! 
Enjoy making your new earring holder! Send us a picture if you make one with your campers!
Posted in Just For Parents | Tagged Camp Crestridge for Girls, Camp Ridgecrest for Boys, Crafts with Teeny, parenting girls, Ridgecrest Summer Camps | Leave a reply
Crafts with Teeny: Summer Fun Jar
Posted by TeenyAs I write this blog the first campers of the summer are finishing up their last full day at camp. Time sure does fly by when you’re having fun. We’ve had a great first session at both camps! We’re looking forward to three more great two week sessions and a starter camp for new campers.
I came up with this craft a few days ago as I thought about what our campers do while they are not at camp. I’m sure many are traveling with families, going to sports camp or perhaps hanging out with friends just enjoying not having to go to school. But I know there are campers and families that spend some time bored, wondering what to do next. This craft is a “Summer Fun Jar”.
Supplies:
– Mason Jar
– Paint
– Paint brush
– Scrap paper
– List of activities
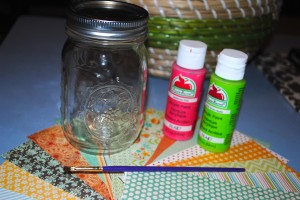
The first step is to paint on the outside of the Mason Jar. I chose to call it the “Summer Fun” jar. You could have your campers paint their own name and then choose their own activities that they want to put in the jar.
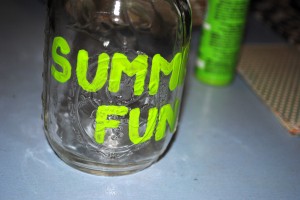 Have your campers write down, on scrap pieces of paper, some activities that they want to do this summer. I have included a small list to help get the ideas started.
– Go to the zoo.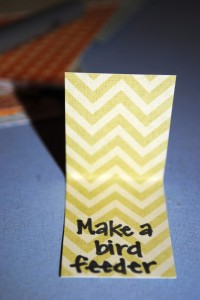
– Make a bird feeder.
– Bake cookies together.
– Make a fort with mom/dad.
– Play in the sprinkler outside.
– Catch fireflies.
– Play with bubbles.
– Make homemade play dough.
– Go to the park.
– Fly a kite.
– Go on a hike.
– Make S’mores.
– Watch a movie.
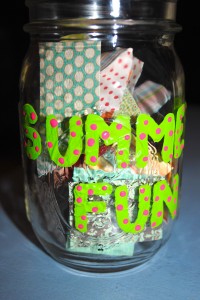
Next time your campers are bored tell them to pull out an activity from the Summer Fun jar. Have a great time this summer with your campers!
Posted in Just For Parents | Tagged Camp Crestridge for Girls, Camp Ridgecrest for Boys, Crafts with Teeny, Ridgecrest Summer Camps, Summer | Leave a reply
Crafts with Teeny: Bird Feeder
Posted by TeenySummertime is quickly approaching which can only mean one thing: campers will be here in just a few short weeks! The flowers are blooming, grass is green and the birds are chirping. We thought it would be a great idea to do a craft to get everyone in the summer spirit. This month’s craft is a homemade bird feeder.
Supplies:
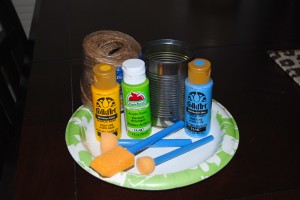
– Tin can (soup can)
– Paint
– Paint brush(es)
– String, ribbon, twine
– Bird seed
Directions:
1. Grab an old soup can and wash it out really well. Make sure to peel off the label and try to get as much of the sticky residue off as you can.
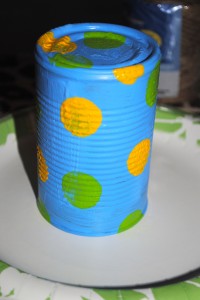
2. Once the can is dry enough to paint, let your campers paint whatever they want! Parents, you can paint your own can and show off your creative side too! Enjoy this time with your kids. Make sure to let the first coat dry before you add decorations like stripes or polka dots.
3. You can either tie string, ribbon, or twine around the can to hang it or you can poke a hole in the bottom and tie string through it to make it more stable.
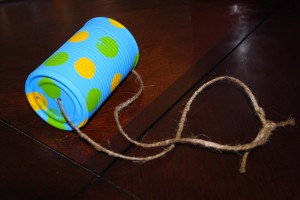 4. Scoop some bird seed into the can and make sure not to fill it too full.
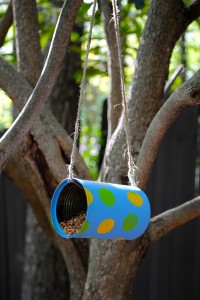
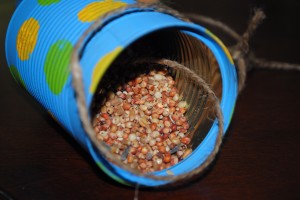 5. Go outside and hang it from a tree branch. Enjoy watching the birds eat out of your new feeder!
We hope you enjoy this craft with your campers. Send us a picture of your new bird feeder on our Facebook page or to rscamps@ridgecrestcamps.com. See you soon!
Posted in Just For Parents | Tagged Camp Crestridge for Girls, Camp Ridgecrest for Boys, Crafts with Teeny, Ridgecrest Summer Camps, Summer | Leave a reply
Crafts with Teeny: Message Boards
Posted by TeenyIt is finally starting to turn warmer here at camp! Flowers are starting to bloom and the trees are getting their leaves back. Spring only means one thing: it’s almost time for camp! We are excited that camp is right around the corner. Our first staffers will arrive in about two weeks.
I don’t know about you, but I find myself always looking for a place to write down a reminder to myself or a note to someone else. Sticky notes are great, but they are pretty small. I found these ideas on Pinterest the other day when I was researching message boards. They are both fairly easy and quick to make. There are tons of possibilities on how to decorate them. I’ll show you how I did it, but it would be fun to see how your campers decorate their own!
Supplies for Chalkboard Tray:
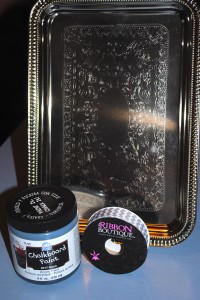
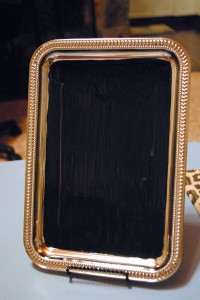
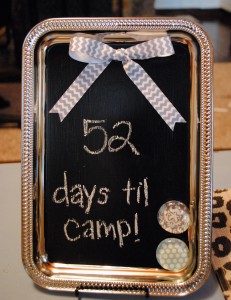
– Tray (Dollar Tree $1)
– Chalkboard paint (Joann $6.99)
– Any decorations you want to add (ribbon, bow, etc.)
The first step is to paint the tray, or you could use an old picture frame, with the chalkboard paint. You can tape off the area if you want or paint the whole thing. Let your campers be creative! I used black paint, but they sell all different colors or you could look up a recipe on how to make your own chalkboard paint!
You will want to make sure that the paint dries completely before adding decorations or trying to write on it. It took two coats for mine and I let it dry over night. I added a bow at the top but there are endless possibilities. You could also use stickers or paint your name on it.
Supplies for Magnet Board:
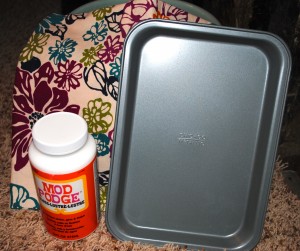
– Cookie sheet (old or new)
– Fabric
– Mod Podge
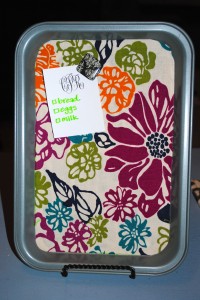
For this project you can use an old cookie sheet or you can buy a new one. You’ll want to make sure you don’t cut the fabric too small. You can either wrap the fabric around the whole cookie sheet or you can just put the fabric in the inside of it. I chose to glue it to the inside of it. If you want the cookie sheet edges to be a different color then go ahead and paint or spray paint the whole cookie sheet before you glue the fabric to it.
Once you have measured and know how you want it to look glue the fabric to the cookie sheet. I didn’t use adhesive spray because I had Mod Podge already. I used a foam brush and painted the Mod Podge on the inside of the cookie sheet. Again, there are tons of options for decorating this message board. You can add some cork board to the bottom of it so you can use push pins or you could use chalkboard paint to be able to write on it. Since cookie sheets are magnetic you can even use your camp bubble magnets!
Both of these are great options for a place to write notes to your family or reminders to yourself! You can also add holes in the top and hang it on your camper’s bedroom door! Send us a picture of your camper’s message boards! We love to see your projects.
See you soon!
Posted in Just For Parents | Tagged Camp Crestridge for Girls, Camp Ridgecrest for Boys, Crafts with Teeny, Ridgecrest Summer Camps | Leave a reply
Crafts with Teeny: Easter Decorations
Posted by TeenyCan you believe it’s almost time for Easter? This winter has flown by here at camp. We’ve all been enjoying the warmer weather recently. The summer will be here before you know it! We hope you’re looking forward to it as much as we are!
When thinking about this month’s craft blog I knew I wanted to do something involving Easter since it’s only two weeks away. I have decided to do two different crafts to give you and your campers some ideas for Easter decorations. These crafts are both really fun and interactive. You might get a little messy, but that’s part of the fun! There is also a bonus at the end of the blog: a food idea!
Craft #1: Embroidery String Easter Egg
Supplies:
– Embroidery String
– Water or regular balloons
– Fabric Stiffener
– Plate or bowl
– Scissors
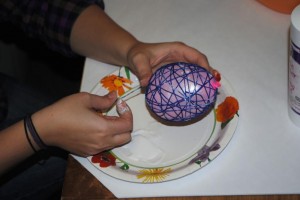
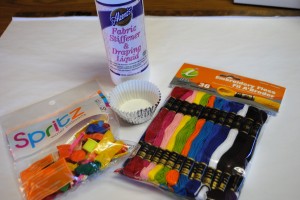 The first step is to blow up as many balloons as you want to use. The balloons need to be in the shape of an egg. You can make them as little or as big as you want. Little known fact about me: I cannot blow up balloons. So Matt blew up six balloons for me. You will want to cut the embroidery string into long pieces, around two or three feet in length. You can use different pieces on one balloon. You will want to pour the fabric stiffener onto a plate or bowl. I found it was easiest to use my fingers and put the fabric stiffener onto the string a few inches at a time and then wrap it around the balloon.
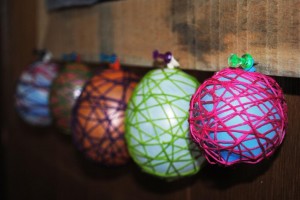
Wrap the string around the balloon in all different directions. Make sure the string around the balloon has plenty of fabric stiffener on it. Your hands will get really messy, but it comes off with water and soap or you can wait until it dries and peel it off. You can use one color or multiple colors. My first few I used different colored string, but I didn’t have enough fabric stiffener on it so it did not work well. Once you feel that the balloon is covered enough you can hang them up to dry. They take about an hour to dry completely.
Once the string is hard and the fabric stiffener has completely dried you can pop the balloon. You can pull the balloon pieces out through the wholes in the string. If the string collapses and does not hold the shape it means there is not enough fabric stiffener on it. My first two eggs collapsed and I had to start over. Once you’re all done and the balloons are popped they should look like colorful Easter eggs! You can put them in a basket or you could even hang them!
Craft #2: Easter Eggs Dyed with Kool-Aid
Supplies:
– Kool-Aid Packets (I used cherry, lemon-lime, orange, mixed berry, and a mixture of lemonade and peach mango)
– Hard Boiled Eggs
– Bowls with 2/3 cup of water
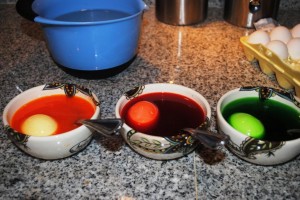
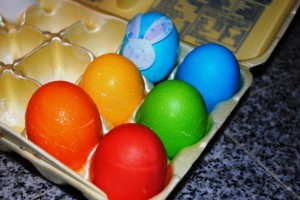
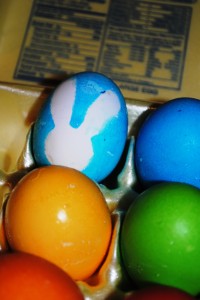
 You will want to start with hard boiled eggs. I did some research and found that you can put eggs in the oven for 30 minutes at 350 degrees and they will turn into hard boiled eggs! I put them in a muffin tin to keep them from rolling around. They will come out with little brown spots but after you soak them in water for 10 minutes they are back to white! Fill small cups or bowls with 2/3 cup of water and the complete packet of kool-aid. You can put the hard boiled egg in the dye for as long as you want. The longer it sits, the darker, more saturated they will be. My bowls weren’t deep enough so I spooned the kool-aid on top of the egg and turned it. It worked out well and completely covered the eggs.
The lemonade is not dark enough so I put half of the peach mango packet with it. The purple makes the egg a dark grayish color. You can experiment with the colors. I also decided to put a sticker on one egg and see if it would turn out well and it did! Be creative with this and let your kids get involved. Be careful because the kool-aid will stain your hands, especially the blue. You will not need any vinegar because the kool-aid is acidic so the color stays well on the eggs.
Bonus: Easter Cupcakes
Supplies:
– Cupcake mix
– Cupcake tins
– Cupcake liners
– Icing (or coconut – pictured below)
– M&M eggs
 Make the cupcakes as directed on the back of the box. You can use any flavor you want. I went with the traditional yellow cake mix. When they are cooled you can either decorate the top with green icing or you can use colored green coconut with food coloring. I originally wanted to use coconut (in the picture), but changed my mind because I’m not a fan of the taste. I used regular green icing and tried to make it look like grass. The last step is to put the “eggs” on top to make it look like Easter eggs sitting in grass. You could also use Peeps or another candy as the eggs.
Let us know if you make the crafts or cupcakes! We would love to see pictures while your crafting or baking or pictures of the finished product! Send us other ways that you are decorating for Easter around your house or making Easter desserts. We hope you and your families have a great Easter!
Posted in Just For Parents | Tagged Camp Crestridge for Girls, Camp Ridgecrest for Boys, Crafts with Teeny, Ridgecrest Summer Camps | Leave a reply
Crafts with Teeny: Chevron Frame
Posted by TeenyHappy day after Valentine’s day! So I have a confession: I am slightly obsessed with the chevron pattern. As I was trying to think about what craft I wanted to do next, I decided to combine my love for photos, camp and chevron and I came up with a chevron picture frame. Parents, it would be great for you to partner with your campers and do this craft with them! You can even use the time while you’re painting together to talk about camp and ask them what activities they’re excited about this coming summer. This craft is inexpensive, relatively clean, and full of possibilities!
Supplies:
- Wooden frame – $5
- Craft paint – $3.50
- Paint brush – $1
- Optional: ruler or card stock triangle – $1.50
- Optional: Krylon acrylic crystal clear spray – $3.99
- Picture of camp friends – priceless!
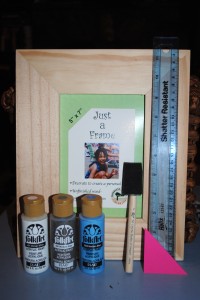 There aren’t rules to this project. I decided to go with the chevron pattern on mine, but you could do anything you want. Leave it up to your camper to decide what pattern they want to paint – or let them splatter paint it!
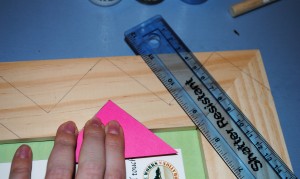
I cut out a triangle from card stock paper for the chevron pattern. I decided I did not want to use painters tape for the chevron pattern and have to deal with cutting each piece of tape. Instead, I traced the top of the triangle and moved it down the frame. I also used the ruler to make sure it was even in between each one. I know it won’t be perfect, but I want it to be fun and whimsical and besides, we’re not perfect around here!
Then I carefully started to paint in between the lines. The foam paint brushes make it easier since they have a straight edge. This is the tedious part but if you’re doing another pattern it might not take as long.
When you’re done painting, let it dry and then you can spray it with a clear finish to protect it and make it glossy. I decided that I like the rustic look since it’s a wooden frame and I opted out of spraying it with a clear finish. The last step is to put a picture of your camp friends in the frame!
 For around $10 you can create a custom picture frame! I’d love to see what patterns you or your campers choose to paint. You can send pictures to rscamps@ridgecrestcamps.com or you can post it to our Facebook pages!
Make sure to check out my next craft on March 15th!
Posted in Just For Parents | Tagged Camp Crestridge for Girls, Camp Ridgecrest for Boys, Crafts with Teeny, Ridgecrest Summer Camps | Leave a reply
