Crafts With Teeny: Earring Holder
Posted by Teeny
This one’s for the girls!
This month’s craft is a homemade earring and jewelry holder. It is very easy to make and a lot cheaper than most earring holders!
Supplies:
– Old frame ($3 Goodwill)
– Paint (optional)
– Burlap
– Glue
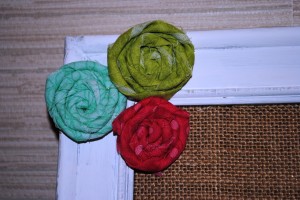
– Fabric Rosettes

1. Paint the frame whatever color and design you want. Make sure to let it dry completely (overnight is best).
2. Paint a design or letter on the burlap to add extra decorations! You can also use screen or chicken wire to hang the earrings. Let it dry completely. 
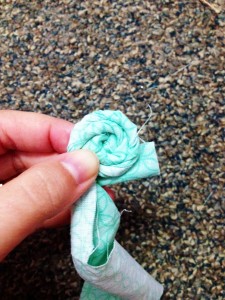
3. While everything is drying you can make your fabric rosettes by cutting extra fabric into strips (2” wide) and then rolling and twisting them into a rose or flower shape. You can add a little glue each time you go around to hold it in place. It’s easiest if you tie a knot at the end of the fabric strip and then start twisting from there. Make sure to keep some extra fabric at the end to fold it over the back and glue it. 
4. I used a glue gun to attach the burlap to the back of the picture frame. You’ll want to make it as tight as you can so that the burlap will hold the earrings. 
5. Finish off the earring holder by gluing your fabric rosettes to the frame and then hang your earrings! 
Enjoy making your new earring holder! Send us a picture if you make one with your campers!
Posted in Just For Parents | Tagged Camp Crestridge for Girls, Camp Ridgecrest for Boys, Crafts with Teeny, parenting girls, Ridgecrest Summer Camps