Crafts with Teeny: Easter Decorations
Posted by Teeny
Can you believe it’s almost time for Easter? This winter has flown by here at camp. We’ve all been enjoying the warmer weather recently. The summer will be here before you know it! We hope you’re looking forward to it as much as we are!
When thinking about this month’s craft blog I knew I wanted to do something involving Easter since it’s only two weeks away. I have decided to do two different crafts to give you and your campers some ideas for Easter decorations. These crafts are both really fun and interactive. You might get a little messy, but that’s part of the fun! There is also a bonus at the end of the blog: a food idea!
Craft #1: Embroidery String Easter Egg
Supplies:
– Embroidery String
– Water or regular balloons
– Fabric Stiffener
– Plate or bowl
– Scissors
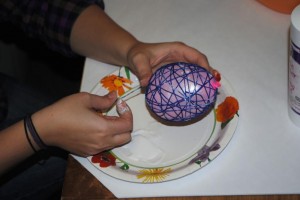
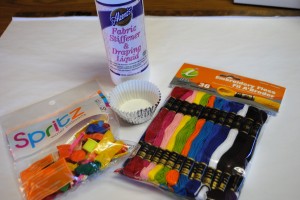 The first step is to blow up as many balloons as you want to use. The balloons need to be in the shape of an egg. You can make them as little or as big as you want. Little known fact about me: I cannot blow up balloons. So Matt blew up six balloons for me. You will want to cut the embroidery string into long pieces, around two or three feet in length. You can use different pieces on one balloon. You will want to pour the fabric stiffener onto a plate or bowl. I found it was easiest to use my fingers and put the fabric stiffener onto the string a few inches at a time and then wrap it around the balloon.
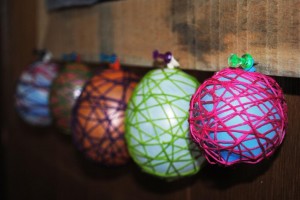
Wrap the string around the balloon in all different directions. Make sure the string around the balloon has plenty of fabric stiffener on it. Your hands will get really messy, but it comes off with water and soap or you can wait until it dries and peel it off. You can use one color or multiple colors. My first few I used different colored string, but I didn’t have enough fabric stiffener on it so it did not work well. Once you feel that the balloon is covered enough you can hang them up to dry. They take about an hour to dry completely.
Once the string is hard and the fabric stiffener has completely dried you can pop the balloon. You can pull the balloon pieces out through the wholes in the string. If the string collapses and does not hold the shape it means there is not enough fabric stiffener on it. My first two eggs collapsed and I had to start over. Once you’re all done and the balloons are popped they should look like colorful Easter eggs! You can put them in a basket or you could even hang them!
Craft #2: Easter Eggs Dyed with Kool-Aid
Supplies:
– Kool-Aid Packets (I used cherry, lemon-lime, orange, mixed berry, and a mixture of lemonade and peach mango)
– Hard Boiled Eggs
– Bowls with 2/3 cup of water
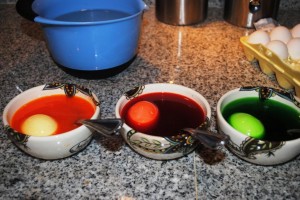
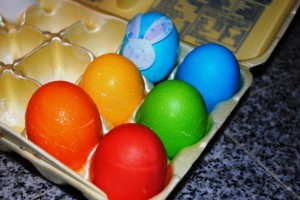
 You will want to start with hard boiled eggs. I did some research and found that you can put eggs in the oven for 30 minutes at 350 degrees and they will turn into hard boiled eggs! I put them in a muffin tin to keep them from rolling around. They will come out with little brown spots but after you soak them in water for 10 minutes they are back to white! Fill small cups or bowls with 2/3 cup of water and the complete packet of kool-aid. You can put the hard boiled egg in the dye for as long as you want. The longer it sits, the darker, more saturated they will be. My bowls weren’t deep enough so I spooned the kool-aid on top of the egg and turned it. It worked out well and completely covered the eggs.
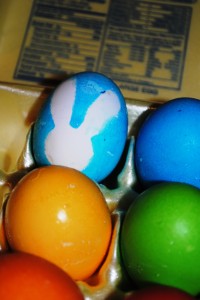
The lemonade is not dark enough so I put half of the peach mango packet with it. The purple makes the egg a dark grayish color. You can experiment with the colors. I also decided to put a sticker on one egg and see if it would turn out well and it did! Be creative with this and let your kids get involved. Be careful because the kool-aid will stain your hands, especially the blue. You will not need any vinegar because the kool-aid is acidic so the color stays well on the eggs.
Bonus: Easter Cupcakes
Supplies:
– Cupcake mix
– Cupcake tins
– Cupcake liners
– Icing (or coconut – pictured below)
– M&M eggs
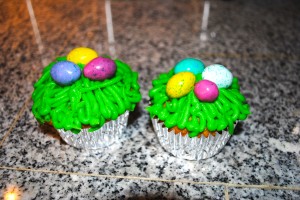
 Make the cupcakes as directed on the back of the box. You can use any flavor you want. I went with the traditional yellow cake mix. When they are cooled you can either decorate the top with green icing or you can use colored green coconut with food coloring. I originally wanted to use coconut (in the picture), but changed my mind because I’m not a fan of the taste. I used regular green icing and tried to make it look like grass. The last step is to put the “eggs” on top to make it look like Easter eggs sitting in grass. You could also use Peeps or another candy as the eggs.
Let us know if you make the crafts or cupcakes! We would love to see pictures while your crafting or baking or pictures of the finished product! Send us other ways that you are decorating for Easter around your house or making Easter desserts. We hope you and your families have a great Easter!
Posted in Just For Parents | Tagged Camp Crestridge for Girls, Camp Ridgecrest for Boys, Crafts with Teeny, Ridgecrest Summer Camps
